Once Git is installed, using it is just a matter of navigating to the directory that you want to manage, and then initializing it. This process is called creating a Repository or repo for short.
Now we’ll create a couple of directories on C drive and initialize one of them as a repo.
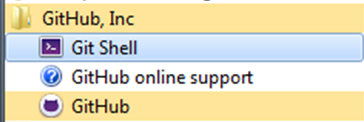
1. First we’ll start Git Shell to create and initialize Git repo
Run Git Shell from the location where you installed Git
 2. Now we’ll create a GitHub folder on C Drive:
Command used: mkdir foldername
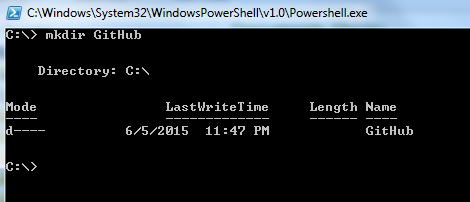 A folder is created for GitHub.
3. Now we’ll create a folder called repo where we’ll keep all our repos. All of our repositories are going to sit within this Repos folder.
Command used:
cd repo
(Command Explanation: cd – Change Directory to go within the directory)
mkdir GitBasic1
cd GitBasic1
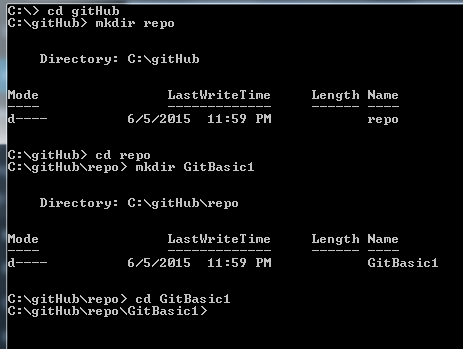 Now we are within the GitBasic1 folder.
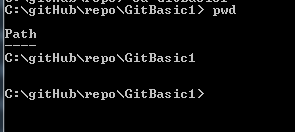
4. We can check our present working directory by typing pwd
 We have created folders to keep our practice file. Now this is the time to initialize Git repo
5. Initialize Git repo by using below command:
Git init,
So G-I-T for Git, space, and then I-N-I-T for initialize, Gitinit. Hir Return key. As soon you hit Return, it tells you that it initialized an empty Git repository.
 If you have hidden files turned on, you can see that a folder called .git is created that has below files
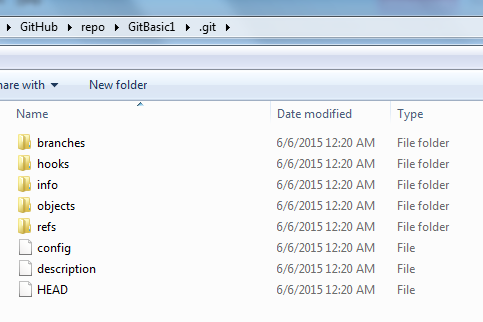 Git uses these files to track Git repository. Now we have created a directory, and we’ve initialized it as a Git repository. So, Git’s going to track all the files and all the folders in that directory, and it’s going to allow us to use Git commands, to control the versioning process.

Please comment with your real name using good manners.